Pages

Tuesday, 6 May 2014

Fabric envelopes

We need them for carrying important papers.

We need them to store those valuable hard copy data.

We need them to collect bills in one place.

If we look around our house or office we will find numerous items calling out to us to be stacked in an organized manner. These essential documents deserve folders and organizers. Allotting a folder to each one or each category of them will not only make things look neat and tidy but will also save us a lot of trouble hunting through stuff.

Now that the need for folders in established why not make these folders attractive? Let us move away from the store bought plastic ones and graduate to a fabric folder. A super simple DIY fabric folder!

You could use jute or burlap as I have done or go for any other thick material. Or you could use an interfacing to give a rather thin material some stiffness.


The folder that I have made is 15x10.5 inches in size. You can always make alterations as per your need. I needed it to carry some A4 size documents so this size. I may soon be making some in different sizes as well.
As I said this was an extremely easy DIY craft piece which hardly takes time to take shape. For the one mentioned here (the green polka dot folder) this is what you need:


Burlap or jute – 15 x 23
Fabric of choice for embellishment (for front) – 15 x 4
Piping fabric – you will need to measure the raw edges that require piping and prepare accordingly. Alternately you can use fabric tape which is bound to be a lot easier. Since I did not get that I went ahead and made the piping.
Self-adhesive Velcro – 2 pcs
Thread matching the fabric or burlap
A pair of scissors
And last but not the least a sewing machine.

How to make:

We have all made envelopes when we were kids and this is one of the simplest ways to do it. Take the burlap lengthwise and 9 inches from ones side fold it towards the middle.

Now take the other end and make a 4.5 inches fold towards the middle so that it overlaps the other folded end. Press well to make distinct fold marks. These overlapping parts form the back of the folder. Turn over to get the front portion.

Open up the fabric and align the embellishing fabric on the front portion. Stitch it in place. I have attached it towards the bottom.

Since edges look ragged attach the piping. Begin with the both breadth sides – the 15 inch sides.
Fold it back and stitch both the open sides so as to give it the shape of the folder or envelope. You basic product it ready. Now stitch or stick the fabric tape on the edges. Since you have already stitched the sides they will not open so sticking will be just fine.

All that remains to do is ensure that the folder keeps papers secured - so place the Velcro patches. One good way to do it would be to attach both sides to each other. Now peel off the patch and stick to one side. When well secured peel of the patch from the other piece and close the flap of the folder. The Velcro will stick to the other side in just the right place.

And in no time your DIY fabric folder is ready!!!


Tuesday, 1 April 2014

Whole Wheat Chocolate Almond Muffins

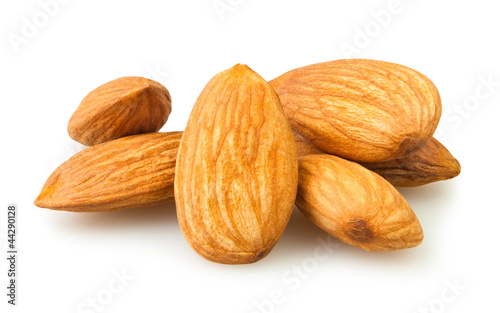
Almonds, we all know are a storehouse of nutrition. But which child likes to have them willingly? Not many that I know of. Yet all of us as mums always make efforts to include the wonder nut in our children’s diet. Trying to list down the benefits before them does not have much effect, especially if the child is a very picky and fussy eater. Besides, with tempting junk food all over the place who would want to go for ‘almonds’ of all things?

Let us recap the benefits of almonds which will once again rekindle our efforts to sneak in almonds in the diet in different forms.

Almonds contain vitamin E, vitamin B12, manganese, copper, magnesium, phosphorus and lots of fibre.

With almonds in one’s diet the risk of cardiovascular diseases are greatly reduced. They help lower ‘bad’ cholesterol LDL and the flavonoids in them protect the arteries from damage.

The presence of phosphorus helps build strong bones and teeth.

According to Ayurveda almond consumption can also be linked to better brain functioning and longevity.

Research is also on to check the benefits of almond consumption and reduced cancer risks.

These are just some of the advantages of consuming almonds but they are proof enough to include them in the family diet. Given here is a muffin recipe that not only uses almonds but is also made with whole wheat. The addition of chocolate overpowers the almond taste to a great extent and children may never know that they are having almonds.  

Ingredients:
Whole wheat flour – ½ cup
Roasted Almond meal – 2 level tbsp
Brown Sugar – ½ cup (can use less as sweetness is a matter of personal choice. I used a little less than ½ cup)
Egg – 2 large
Vegetable oil – ¼ cup
Unsweetened cocoa – 1 heaped tbsp
Baking powder – ½ tsp
Vanilla extract or essence – 1 tsp
Whole almonds – 3 slit in to 6 halves (optional)

Method:
Sieve the wheat flour, baking powder and cocoa. Set aside.

Line six muffin moulds with muffin liners.

Pre-heat oven to 180 degree Celsius.

Separate the eggs. Place the egg whites, sugar and vanilla in a large bowl. Beat well until soft peaks form.
Add the oil to the egg mix and beat again until well mixed and peaks formed. A good whipping here ensures that air has been well trapped to give a well risen muffin.

Add the egg yolk and beat again for about a minute.

Pour in half of the dry ingredients and mix with a wooden spoon. When mixed well pour in the other half and mix again. At this stage all you need to do is fold in the flours. No beating is required else the trapped air will escape.

Spoon the batter in to the lined muffin moulds filling just a little more than half full.

If you wish you can place a half of an almond on each muffin at this stage just before putting the tray in the oven.

Bake in a pre-heated oven for 30-35 minutes or till the top is dry and a skewer comes out clean.
Enjoy it hot or cold. It could be with a beverage of your choice – milk or coffee and once again hot or cold.

These muffins make excellent snacks both at home as well as a carry along one. Place them in your child’s lunch box and rejoice at his beaming face.